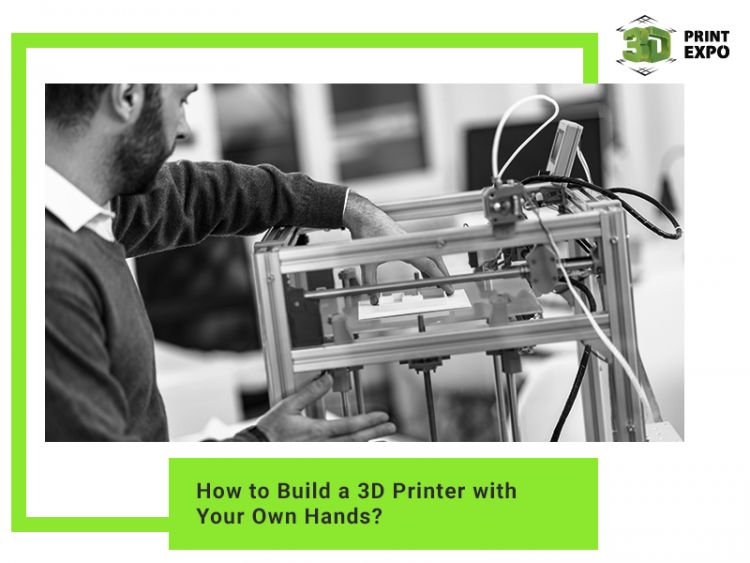
How to Build a 3D Printer with Your Own Hands?
Today there is a wide variety of 3D printers available in the market produced by both Russian and foreign manufacturers. Their cost reaches hundreds and thousands of dollars. For this reason, not everyone can afford such machines. However, you can become a 3D printer owner by building it with your own hands at home.
How to build a 3D printer with your own hands? What will you need and how much will it cost? Read in the article below.
Building a 3D printer on your own
Many engineers want to make the 3D printing technology open to the general use. RepRap Project is intended to solve this task. 3D printers of this category are capable of printing exact copies of their component parts. They can self-replicate up to 50% of their elements. In other words, one machine can print parts for making an analogous machine. By buying additional details, you can assemble a new device.
The cost of self-replicating printers can reach 200,000 rubles and not everyone can afford them. The cheapest way to get your own 3D printer is to assemble it with your own hands.
Constructing a 3D printer is not such an easy process as it may seem. However, a homemade machine will cost you much cheaper than buying a new one. Besides, in the process of assembling, you will thoroughly learn what elements the machine is comprised of, how it functions, what operating principles it has. Thanks to this, you will be able to master 3D printing quicker.
There are several ways to build a printer at home:
1. To develop and design your own unique model. Here everything depends on your knowledge, skills, imagination, and abilities. But it is important to take into account that in the process of constructing a new machine, you may face problems with settings and functions.
2. To assemble a device using readymade and known projects freely available to the wide public, including RepRap Mendel Prusa i2, Prusa i3, and their configurations.
Assembling Prusa i3 Steel
Let’s view in detail how to assemble Prusa i3 Steel 3D printerwith your own hands. This machine is considered a new-generation device of the RepRap project.
Roughly speaking, the development of the 3D printer takes place in several stages:
1. Purchase of necessary parts;
2. Assembling of the printer;
3. Making the machine ready for exploitation.
The first stage. Buying parts and accessories
If you opt for assembling a 3D printer with your own hands, you can follow two paths:
1. To find and buy all parts independently;
2. To use readymade kits. Their price ranges from 15,000 to 35,000 rubles. Kits usually include only basic parts, so you still have to buy some extra elements.
If you decide to buy all the components for the printer on your own, you will be able to save money and choose parts of higher quality.
The main components of any 3D printer are:
- static and moving elements (mechanics) – case, guide shafts, belts, screws, bearings, etc. Appropriate selection of these elements influences the quality of printed items;
- elements that trigger and enable the operation of the printer. They are engines, control boards, drivers, display, power unit, etc.
Case
The case can be made of plywood, chipboard, acryl, or metal. The last option is more sustainable. Although metal has a higher cost and bigger weight, it will serve for a longer time and will cope with its tasks better. The original Prusa i3 Steel has the case made of steel.
You can make the case with your own hands. Corresponding drawings are freely available. You can take them and turn to companies that provide cutting services for different types of materials.
Readymade cases of Prusa i3 Steel can be purchased on various online platforms. Their advantage is that they come with all the needed external and internal screws. If you decide to cut the case on your own, you will have to buy these elements separately.
Guide shafts
Operation of guide shafts influences the fidelity of 3D printed items. For this reason, you should take the purchase seriously.
To assemble 3D printerPrusa i3 Steel, you need six guide shafts. They have to be of the same size. Linear guides are the best option. They cost several times more than traditional ones but can ensure the highest possible accuracy of produced items.
The standard diameter of guide shafts for the 3D printer is 8 millimeters.
These parts can be purchased in online stores. Another option is to buy guide shafts left from old office machines.
Bearings
Prusa i3 Steel uses 11 linear bearings and one 608 ZZ bearing. Elements are available at local markets, online stores, or can be 3D printed.
Stepper motors
To assemble a machine, you need four Nema 17 motors. Online stores sell sets made of five motors. A spare element can be of use for further upgrades of the printer.
Besides, you can use stepper motors taken from formerly used multifunctional devices, printers, and plotters.
Controller and voltage regulator
To build a 3D printer, you need Arduino Mega 2560 R3 circuit board. It acts as the brain of the machine. Firmware is uploaded to its processor.
You should take into consideration that by making some wrong actions when assembling the printer (for example, by connecting the stepper driver incorrectly) you can burn the circuit board. The purchase of a spare Arduino Mega 2560 R3 helps to solve this problem.
Besides, you need an add-on board for Arduino called RAMPS 1.4. It is linked to all electronics and stepper drivers.
You also need to buy a voltage regulator, which allows protecting the main circuit board against malfunction.
Stepper drivers
They are small chips responsible for the operation of motors. Overall, five A4988 drivers are needed.
It is a good idea to buy several spare chips. They will be of use if one of the elements is burnt.
LCD
The display allows monitoring the state of the print and managing the machine. Choose the device with a shield and a loop. Then you will be able to connect it easily. Besides, it is recommended to buy a display with a built-in card reader to insert the memory card containing 3D models.
If you plan to connect the printer directly to the computer, you do not need the display. However, owners of 3D printers advise printing from the memory card. It allows using the printer anywhere not being tied to the computer.
Power unit
This element shows the power capacity of your printer. Specialists with handicraft experience in assembling of 3D printers state that the device equipped with one heated bed and 1-2 extruders needs a 12V power unit.
Extruder
It is a print head that makes items from plastics. The filament is fed through the extruder and squeezed out of the nozzle onto the headed bed.
The extruder consists of two parts: cool end and hot end. The first is responsible for feeding the filament for the print, and the second represents a nozzle with a heating element.
There are several types of extruders. Experts advise choosing models with the filament feeding mechanism located directly before the heating element. With such extruder, you can produce items from different types of plastics.
Take into account that the nozzle can get plugged up. It should be cleaned with a special drill bit. Not to damage the nozzle, this procedure should be carried out extremely accurately. Some owners choose not to clean the nozzle but to buy a new one.
Heated bed and glass
A heated bed is a platform where the printed item builds up. It has to be heated to the temperature of 100-110 degrees Celsius if you plan to make items from ABS plastics. For the print with PLA plastics and other materials, heating is not required.
You also need to buy a glass placed on top of the heated bed. It can be an ordinary window glass. But it can endure heating to 90 degrees Celsius maximum. A better option is a borosilicate glass or a looking glass.
Blowers
You need two blowers. One is needed to blow on the materials that slowly become solid, and the other to blow on chips. The use of a big cooling system can reduce noise.
Small parts
To assemble a 3D printer you need:
- GT2 belt;
- pin screws with metric screw thread М5, diameter 8 mm, length 345 mm – 2 items;
- NTC thermistor 100kilo ohms 3950;
- jointing sleeve 5×5mm – 2 items;
- mechanical constraints – 3 items;
- power socket with a button;
- cables (to connect stepper motors);
- springs for the heated bed – 4 items, for the Хaxis constraint – 1 item;
- GT2 pulleys with 16 teeth – 2 items;
- braid for cables;
- USBcable;
- power cable 220V;
- internal screws, external screws, disks, long bolts.
When you buy small parts, do not follow the list closely. If there are chances to damage or lose some parts, it would be better to buy some spare items.
By various estimates, the total cost of all component parts needed to assemble a 3D printer can reach 20,000+ rubles. The readymade construction kit Prusa i3 Steel costs up to 50,000 rubles in the Russian online stores.
The second stage. Assembling a 3D printer
After you buy all the parts needed to build your own 3D printer, you can start assembling them. You will need the following instruments:
- sets of screwdrivers and hexagon drives;
- side-cutting pliers;
- pliers;
- drill bits of different diameters;
- silicone gun;
- wire stripper;
- heating torch;
- heat shrink tube (to insulate cables), and other tools.
Observe the safety procedures when you connect component parts. Use all tools for their intended purpose only. Upload electronic components to the printer only when the power supply is off.

The third stage. Software installation, setting-up, and exploitation
After Prusa i3 Steel is assembled, you can proceed with software.
Download Marlin firmware and Arduino IDE. The latter is intended to correct and upload software to the printer. Upload firmware to the printer and install the required software. To set up software independently, follow this guide.
The final step is to set up the slicer. Afterward, the 3D printer is ready to operate. Experts advise printing with PLA thermoplastic for the start.
You can find guides, articles, and videos about setting-up, maintenance, upgrades, and exploitation of Prusa i3 Steel 3D printeron different themed websites.

What do you get in the end?
After you assemble Prusa i3 Steel with your own hands, you get a robust machine with an increased print area that allows producing items from such materials as ABS, PLA, HIPS, FLEX, and PVA.
If desired, you can modernize your 3D printer. For example, you can equip it with the second extruder or install an element with two print heads. Besides, you can replace linear bearings with caprolon or copper plugs. As a result, you will improve the quality of the print.